Underpainting coloured pencil
Why would we consider underpainting coloured pencil with watercolour pencils?
Wax based coloured pencil drawings are created by building up layers of translucent and semi-translucent colour. The pencils require the paper to have some 'tooth' which takes the pigment from the pencil point. Tooth is the grain of the paper, or the roughness of it. The tooth is critical to the number of layers you can achieve - and the eventual density of colour you will reach.
If the paper is smooth and has too fine a tooth, you will be limited to fewer layers and could end up with a pale, wishy washy result.
A rougher textured paper with more tooth will allow more layers but you may find it difficult to get fine detail in your drawing.
The prime problem is the little flecks of white coming through from the dips in the paper tooth. The pencil point skims over the paper surface laying down colour, but misses out on the little valleys in the paper grain. We can burnish the colour by pressing firmly down with further layers to press the colour into the grain, but this kills the tooth altogether preventing any more work in those areas.
Underpainting coloured pencil with watercolour pencils is the solution to the problem and the method used by many of our top coloured pencil artists.
NOTE: If you are working to strict coloured pencil society rules for exhibition standards, you will probably not be able to use dissolved watercolour pencils unless you enter your picture in the Mixed Media classes. 'Coloured pencil' in many coloured pencil societies means only wax type - non soluble - pencils are permitted. This means that watercolour pencils, Neocolour crayons and Cretacolor woodless pencils are only available as a souce of colour if they are used DRY.
If you are working for your own amusement or to sell images commercially - where exhibition standards are not required - you can use whatever pencil media you like! You can also incorporate traditional watercolour, fixed pastel or inks for enhancing the colour depth and filling the grain of the paper with colour first.
Either way, with a layer of colour bonded to the whole of the paper surface, underpainting coloured pencil allows you to add layers of dry pencil to a pre-coloured surface that is as good as taking up colour as the original paper was.
This ensures that you are able to start work with your coloured pencils, with an element of tinting and shading already down on the paper, with all the paper grain available to you.
Where you are using a heavily sized watercolour paper like Arches, which has quite a polished surface, the working of wet washes first removes some of the size from the surface and lifts the grain slightly, which benefits the later addition of dry pencils.
I suggest that before you use any watercolour pencil pigment as a wash, you first check the way the pigment dissolves at greater dilutions. Ideally a weak mixture will show up if the pigment is a finely ground material which totally dissolves. More opaque pigment will lie on the paper in a less even manner.
Because the paper will react to the addition of water, you will need to understand how the surface contract and expands. To avoid you paper buckling you will likely wish to stretch it first if you are going to use large amounts of water.
In practice, I have found that some brands of aquarelles (watercolour pencils) such as Faber Castell Albrecht Durer and Derwent Watercolour Pencils, do have some more 'traditional' natural watercolour pigments included. These are fine when used on the paper as a dry colour and then wet with a brush, but do not always produce good thin washes.
This is why I tend to use the Staedtler Karat Aquarelle pencils for thin washes, as the colour totally dissolves in liquid. This is probably because the pigments used are generally organic colour substitutes. They will stain the paper ( so they will be difficult to lift if you put them in the wrong place ), but you do get good even washes to provide a good colour base. Peter used these pencils on his dartmoor landscape tutorial for the underpainting.
The most controlled way of laying down your first colour to the page is using pigment in watercolour form from the pencil. It is best not to wet the point itself (as explained above), although many textbooks do suggest this method.
The method I advocate is to use a small china or plastic palette, or to use a piece of strong watercolour or sanded paper as a source of dry pigment and lift the colour with a brush from there.
Another page which illustrates this method shows a Scottish Hillside scene, but do read the remainder of this page for some techniques which it may help to cover in detail first, such as taking fine shavings of pigment from the long Aquarelle pencil tip and placing them in a small dish or jar.
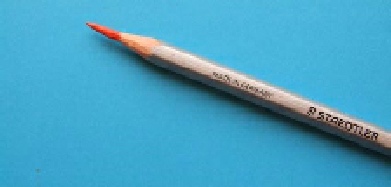 The pencil needs a long sharp point from which powdered pigment is removed with a knife
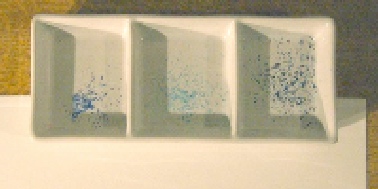 Keep in mind only a small amount of dry colour is required in the dish
Some colours are much stronger than others, so you do need to test the options first. See the results in the following photo on the paper sample below the palette.
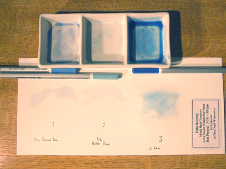
Here you can see that Powder Blue on the left is much weaker than the basic Blue on the right.
Sky blue in the middle contains a lot of white and hardly makes any impact at all. The basic Blue on the right is a very strong colour and needs care. The original amount of dry colour was about the same in each dish.
If you are painting with a wider range of colours, use a large white plate and select a suitable range of colours for your subject. These can be mixed in situ, or can be picked off the plate and mixed with more water elsewhere.
Underpainting coloured pencil demonstration
Let's look at underpainting coloured pencil in an example picture.
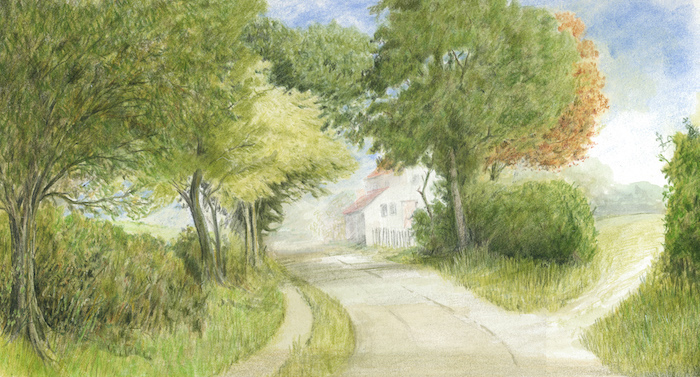
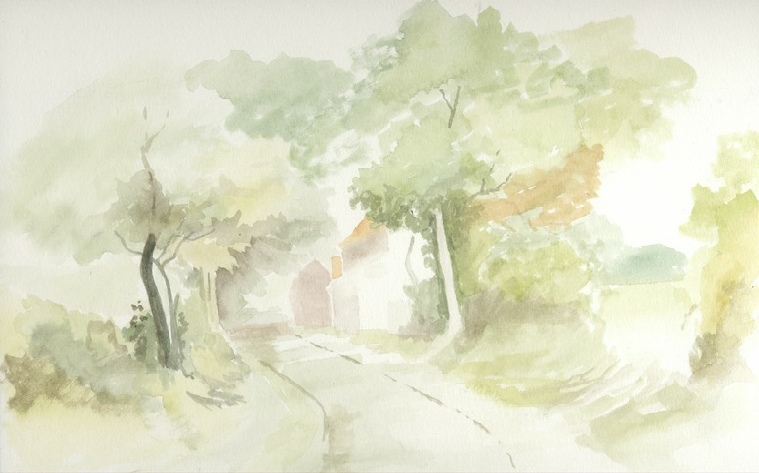
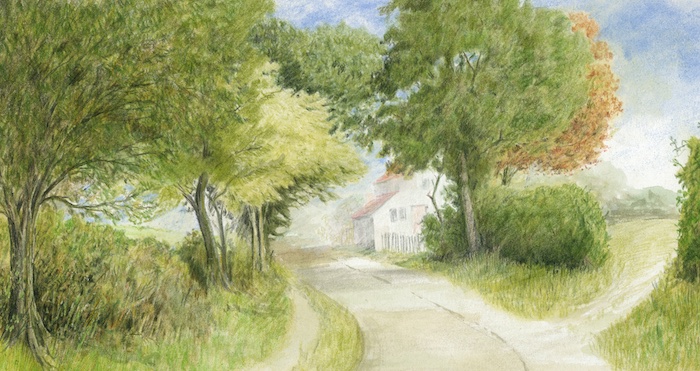
The original underpainting (below) was positioned on the paper with plenty of room around it. As a result is was possible to add some more to the scene on the left hand side as the picture developed. I think this improved the overall composition.
You will see that I removed some of the under painted foliage to the immediate right of the copper beech tree on the right hand side to open out the sky over the field. Putting a cloud in was not entirely successful, but it hardly shows in the original completed picture. This scene does not exist and is entirely constructed from imagination.
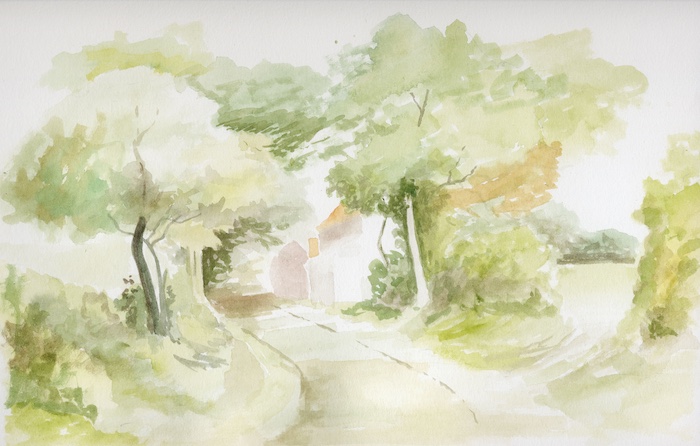
 Country Lane - the first washes
The final picture had very little extra work done with dry pencils on top of the cottage. This allows it to sit right in the background as a result.
We can use the traditional 'line and wash' approach of laying down a line or shading of dry colour on the paper direct from the pencils using a limited range of colours. We keep our shading very light so that we have control over the eventual depth/density of colour. After washing in the first layer we can then continue with dry pencil work on top. An example of this approach is shown in the detailed step by step titled Coventry Canal.
As you can see from the above example, when underpainting coloured pencil you only need a THIN layer of colour. It is better to use two thin layers of colour than one thicker one. The mini step by step below shows this in action.
 Second layers of wash on the paper
With the second layers of wash, concentrate on where the greater depth of colour will be needed.
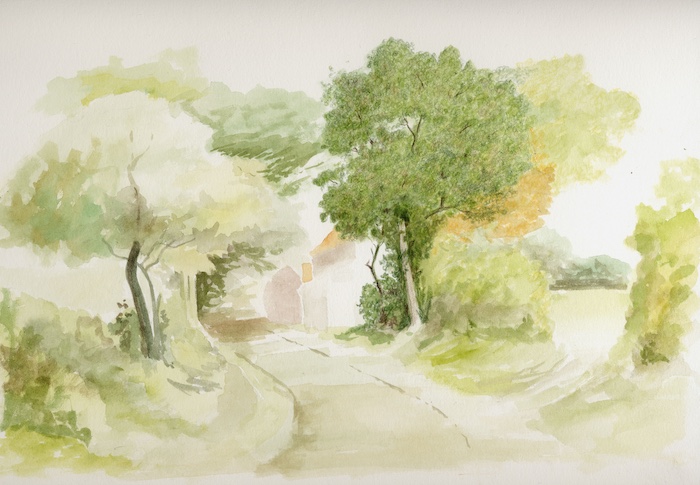
Once the washes are dry you can begin to build up the dry pencil to the drawing.
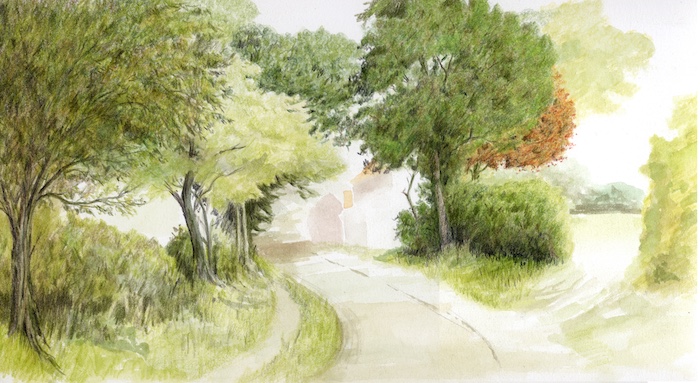
Darker shades are now added in dry colour. An additional tree was added on the left to balance the composition.
The sky was added at the top and minimal work done to the cottage by adding windows and shadows. The right hand greenery was also built up with dry pencil.

After the final adjustments the completed image showing the benefits of underpainting coloured pencil is shown above.
You might like these
Watercolor pencil techniques
Learn watercolor pencil techniques as you follow along with this painting of Brokken Bridge in Yorkshire.
Watercolor Pencil Painting Of Coventry Canal - Step By Step
Watercolor pencil painting techniques used to depict an English canal scene. Step by step tutorial for water soluble pencils
How to draw trees in watercolour pencil
Draw trees using watercolour pencil techniques - basic steps for two step by step landscape drawing tutorials


You might like these
Aquarelle Background Tutorial: How To Use Watercolor Pencils
Aquarelle background tutorial - Scottish Hillside Scene - using watercolor pencils
Watercolour pencil tutorial - Italian Street Scene
A step-by-step demonstration showing how to create an Italian street scene using watercolour pencils from Caran d'Ache
Watercolor Pencil Painting Of Coventry Canal - Step By Step
Watercolor pencil painting techniques used to depict an English canal scene. Step by step tutorial for water soluble pencils
- Home
- Watercolor Pencils
- Country Lane tutorial
Would you like our occasional newsletter?
Home | About Us | Contact Us | Privacy Policy
Copyright Peter Weatherill and Carol Leather - 2009-2024