Ready to learn basic coloured pencil techniques?
Trying different techniques using coloured pencils can improve your artwork!
Some of those that follow are unique to this medium. They may seem unfamiliar at first. But don't worry.
We'll explain things simply and provide links to useful tutorials. You'll be underpainting, layering, and burnishing like a pro in no time.
Coloured pencil mark making
When it comes to creating art with colored pencils, the magic lies not just in the hues you choose but also in the mark-making techniques you employ. Several key factors can drastically alter the outcome of your work: pencil sharpness, pressure, and stroke types like parallel lines and cross-hatching.
The sharpness of your pencil is crucial for adding those fine details that bring a piece to life, creating crisp edges and intricate textures. On the flip side, a blunter pencil offers its own benefits, allowing for softer, broader strokes that can fill large areas with gentle gradients of color. It's a simple tool, but the range of effects you can achieve is impressive!
Adjusting the pressure also has an effect. A soft touch can create a faint hint of color, perfect for building layers or achieving that elusive translucency.
Apply more force, and you'll see the pigment become more pronounced on the page, standing out with vibrant, opaque strokes. It's a balance between your hand and the paper, and you're in control.
In exploring stroke techniques, consider the structured texture of parallel lines for conveying form and the dynamic layering of cross-hatching to add shadows make your drawings look three dimensional.
But it doesn't end there. These techniques are just the beginning. You also have the option of using stippling, scumbling and more!
I've got a wealth of tips and tricks waiting for you, and I'm excited to share them. So, if you're curious and ready to expand your colored pencil skills head over to the colored pencil strokes page to explore further...
Underpainting coloured pencil artwork
Underpainting is a technique that has its roots in the world of oil painting.
The old masters began by painting a monochrome version of their final piece, using shades of grey or a complementary colour. This initial layer set the tone for the entire artwork, providing a solid foundation upon which to build subsequent layers of colour.
As coloured pencil artists, we can also appreciate the wonders of underpainting.
By blocking in your lights and darks early on you establish the values and tones right from the get-go, saving you from the headache of making major changes later on.
But underpainting with coloured pencils isn't just about planning; it's also about creating depth and richness. The underpainting peeks through, lending complexity and a sense of realism that's tough to achieve otherwise.
And from a practical side of things, underpainting can help you cover a large area much faster than building up colour with pencil alone. A hidden benefit is less hand fatigue.
Underpainting for us colored pencil artists is a powerful technique, steeped in tradition but adapted for our modern needs.
Coloured pencil layering techniques
Layering coloured pencils is a bit like stacking sheer fabrics. Each layer adds a hint of color, and together, they create a rich, complex shade. It's a simple yet powerful technique that can breathe life into your drawings.
When you layer, you start with light pressure and build up to the desired intensity. This method lets you mix colors right on the paper. The more layers, the deeper the color and the moodier the atmosphere.
As you build layers the tooth of the paper is filled avoiding the white dots that can sometimes distract from the overall effect you're aiming for.
Layering takes time, but the results are worth it.
Indenting and scratching

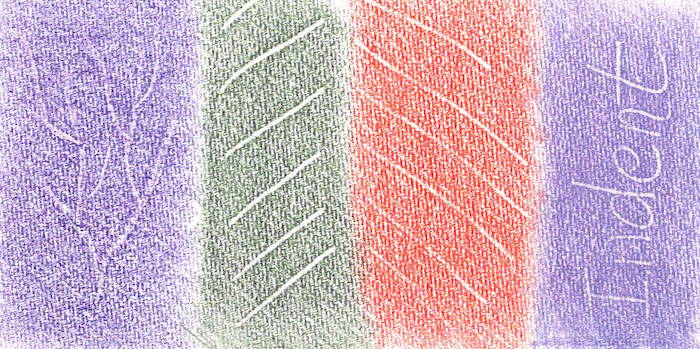
Indenting your paper is a useful technique that can add texture to your drawings. Imagine you're drawing a leaf, and you want those delicate veins to show up lighter than the surrounding colour.
Here's what you do: before you start colouring take a stylus – which is just a tool with a pointy end, kind of like a ballpoint pen that no longer writes – and you gently press it into the paper along where you want those veins to be. It's like you're drawing invisible lines. Don't press too hard, or you'll tear the paper.
With a fine stylus, you can add also add delicate details like whiskers to your artwork. You can lay colour over the area and the pencil will skip over the indented lines ensuring they remain pristine. If you want them a pale colour add that before indenting.
You can use a sharp tool, like a craft knife or a slice tool (ceramic blade), to gently scrape away some of the pencil.
This way you can reveal the bare paper or the colours you laid down earlier. This coloured pencil technique is great for adding fine details, like the texture in animal fur or blades of grass.
Be careful with this method as it won't work on all surfaces.
Both of these methods are about control and being gentle. They help you add those intricate details that make your artwork stand out. So, grab your stylus and scratching tools, and give it a go. You might be surprised at how much texture and depth you can create with these simple moves!
Burnishing coloured pencil
Burnishing is a technique that's used to create a smooth, glossy finish on your coloured pencil pieces.
The magic of burnishing lies in its ability to create a surface that's perfect for still-life pieces, with their delicate vases, fruits, and glassware. But it's not just limited to still life - burnishing can also be used to create stunning animal eyes and noses, adding a whole new level of realism and detail to your work.
One option is to use a colorless blender pencil, which is specially designed to smooth out the pencil lines and create a more polished, painterly effect. But you can also use a white or light coloured pencil for the same purpose.
The key is to use gentle pressure and work slowly and carefully, building up layers of pigment until you achieve the desired level of texture and depth.
With a little practice and experimentation, you'll be amazed at the beautiful results you can achieve with burnishing.
Using paper blending stumps

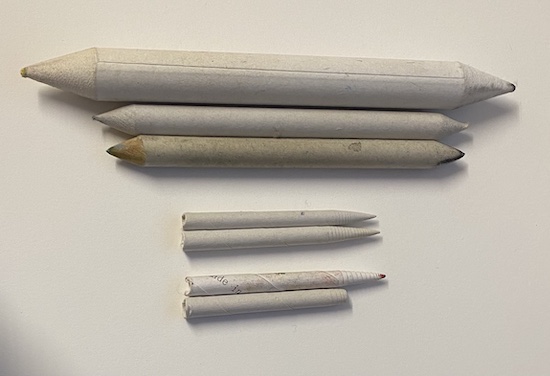
Blending techniques are essential for any coloured pencil artist, and paper blending stumps and tortillons are beloved tools that allow you to blend and soften the edges of your pencil lines.
These simple yet versatile tools allow you to blend coloured pencils and soften the edges of your pencil lines, creating a seamless transition of colours and textures.
But don't let their simplicity fool you - blending stumps and tortillons are true multitaskers. You can use them to create a wide range of effects, from subtle shading to bold textures, making them an essential tool for any colored pencil artist. It is also possible to blend coloured pencils using cotton swabs.
Applying powdered pigment
Colored pencil art is all about creativity and experimentation, and one technique you may not have tried before is using pencil shavings or grating the pigment into a fine powder.
This technique creates a stunning painterly effect, with delicate clouds and smooth skies that look like they were brushed on with paint. And it's not just limited to clouds - you can use this technique to create large, smooth areas of color in your backgrounds, adding a whole new level of depth and texture to your artwork.
Simply shave or grate your colored pencils into a fine powder, then apply it to your paper using a cotton swab or sponge. The result is a beautiful, soft effect perfect for creating atmosphere and mood in your artwork.
Erasing coloured pencil for effect

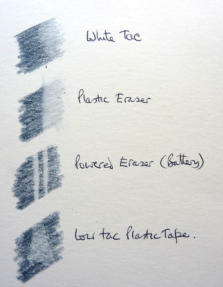
Erasers are not just useful for graphite pencils, the coloured pencil artist can also make use of them.
But these aren't your average erasers - each one serves a unique purpose, from correcting mistakes to creating stunning textures and effects in your artwork. Whether you're using a kneaded eraser to gently lift away pigment or a vinyl eraser to create bold, crisp lines, the right eraser can make all the difference in the world.
And when it comes to erasing tiny areas, there's no better tool than an artist's eraser guard. This nifty gadget allows you to erase even the tiniest of details without smudging or damaging your surrounding artwork, ensuring that your finished piece looks perfect from every angle.
So don't overlook the importance of a good eraser in your colored pencil toolbox. With a variety of options at your disposal, and an artist's eraser guard to help you navigate those tiny details, you'll be amazed at the stunning effects you can achieve.
Eraser guards are available from Amazon (affiliate link) if you have trouble sourcing one locally.
After using these coloured pencil techniques...
Using any of these coloured pencil techniques will help you create a true labor of love. Once you think you've finished, take a step back and admire your masterpiece.
Perhaps an edge needs sharpening, or an area could benefit from a subtle hint of shadow?
Approach your artwork with a fresh eye, looking for opportunities to add that extra layer of detail that will make your work stand out from the crowd. This is your chance to add those final touches that will lift your work from good to great.
- Home
- Techniques


